Friday, January 4, 2013

Create An Abstract Shape Effect Into An Image

Creating a unique and nice effect to your valuable photos is something you can keep and be proud of, if done properly which, I bet, you can do it easily. In this tutorial, you can easily follow the instructions step-by-step, and you'll be amazed of what you've created. This is a variation with a different approach and much better compared to the more familiar collage or jigsaw puzzle effect.

Preview

Step 1: Preparing the Photo

Open your photo to be used, double-click the layer created in the layers palette to unlock it which becomes "Layer 0" as a result. The image I used can be downloaded here if you prefer to use this to get along.

Step 2 : Creating the Rectangles

Create a new layer above the existing layer. Grab the Rectangular Marquee Tool then make rectangles with different sizes randomly onto the image. Don't fill the whole photo yet with rectangles as we will be creating 2 layers more of this.
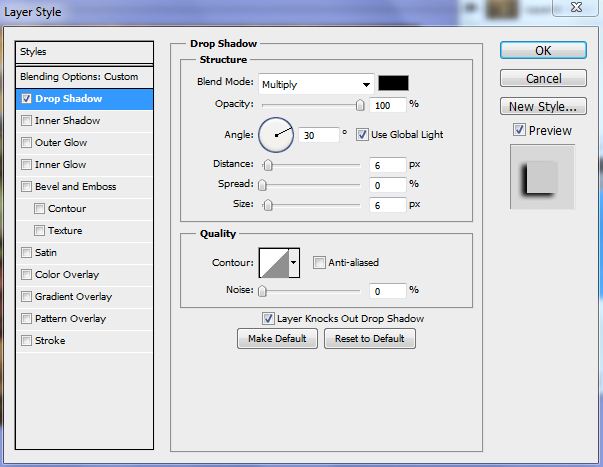
Note: After the first rectangle had been made, press Shift while making the other rectangles to work. This is so, because the rectangles would just be repeatedly deselected otherwise. When done with the rectangles, click on the color palette and choose the gray color (or any color of your choice), then use the Bucket Tool and fill one of the rectangles. That would automatically fill in all the others. Set the blending mode to Overlay, Opacity to 100, and Distance to 7 (or just leave the default values). Click Ok. Here's the result:

Step 3 : Creating the Second Set of Rectangles

Create another layer and do the same process as Step 1 except for the color which should be light gray. When finished, click Layer 1, right-click it and select "Copy Layer Style". Switch back to Layer 2, right-click it and select "Paste Layer Style".

Step 4 : Finishing the Last Set of Rectangles

Create rectangles again, but this time use white color to fill them. Afterwards, activate Layer 3, right-click it, then select "Paste Layer Style". So, finally, we're done with the rectangles and here's what we got:
You can already stop here actually, if you like to. Lookin' good eh! If you prefer to proceed, then we'll continue...

Step 5 : Choosing the Background

You can put any background you want. Here, I preferred to have a simple yet effective solid color. So, to do it, Ctrl-click first Layers 3, 2, 1 icons to select the contents, then activate Layer 0 (our original layer), hit Ctrl-J to create a new layer (e.g. Layer 4, as a result). Select Layer 0 again, then after selecting the orange color, go to Edit>Fill..., then select the foreground color. Here's our layers palette look like :
Here's the final result :

Wednesday, January 2, 2013

Texture Mapping Using Displacement Map

There are various ways where you can use the displacement filter, one of which is the "mapping" of a face by a texture or pattern like the one we used here. What is really amazing in this application is that it follows the contours of the image where your texture is applied to. You can use other textures like wrinkled skin, shirt, or anything you can imagine and try experimenting for yourself which gives you the best results. In this tutorial, I hope you will learn something useful that you can apply afterwards.

Preview

What we need

Step 1 : Prepare the photo

After opening the photo, go to the Channels palette and select which of the channels give the best contrast. In this case, it is the green channel that offers the best result.

Step 2 : Prepare the displacement map

Duplicate the Green channel by right-clicking it, then choose Duplicate channel. In the dialog box that appears, select the Destination as New. A new layer (Alpha 1) will be created as a result inside your channels palette.
Apply Gaussian Blur to achieve a smooth end result which will be seen later as we apply the displacement map.
Go to Filter>Distort>Displace. Save this image now as a .psd file. Name it whatever you want. This will serve as your displacement map.

Step 3 : Select the face

First, switch back to RGB to see the photo in full color again, and then, go to Layers palette. After this, duplicate the photo. Now, select the face using the Lasso Tool. When done, select the eyes, eyebrows, lips, and hairs in the face which we don't want to include in the texture-mapping. Observe the icon selected below.

Step 4 : Bring in the texture

First, we will make the texture into a pattern by going to Edit>Define Pattern of which you will select the opened texture, of course. This will then be saved to your pattern lists. Now, go to Edit>Fill and select Pattern. Select the pattern you've just saved, and presto, the selected faced has changed into a pattern!
But this is not what we'd like to achieve. At least, we've done the first step though. What we will have to do is adjust the color of the original photo and change the blending mode and opacity as well.

Step 5 : Making the color adjustments

So, first, change the blend mode from Normal to Overlay (or what is best depending on the photo you used), then set the Opacity to 50%. You can deselect the selected areas for now (Ctrl-D).
Now, we will switch back to Layer 1 (the duplicated photo layer). You can turn off the uppermost layer, if you want to. In the few next steps, we will be using the Create new fill or adjustment layer, the icon of which is located below the layers palette, that small circle with half of it shaded with black. Select first the Hue/Saturation with the following values:
Second, the Color Balance:
Third, the Brightness/Contrast:
And, fourth, Hue/Saturation once more:
As you can see, the color of the skin is more realistic now. If you want the image to have more color and hue, try experimenting with different values with lesser saturation.

Step 6 : Run the displaced filter

Go to Filter>Distort>Displace...In the dialog box that appears, set the values both to 10, then open the psd file that we have saved afterwards.
Set the blend mode to Soft Light and Opacity to 70%.

Step 7 : The finishing touches

To soften the edges of the pattern, use the Blur Tool using a soft brush; the Smudge Tool to hide the supposedly covered skin with hair; and some Burn Tool where needed. Apply the Curves in the Adjustment filter under Edit with the following values:
Finally, select the iris of the eyes and lips, then apply Hue/Saturation and check Colorize.

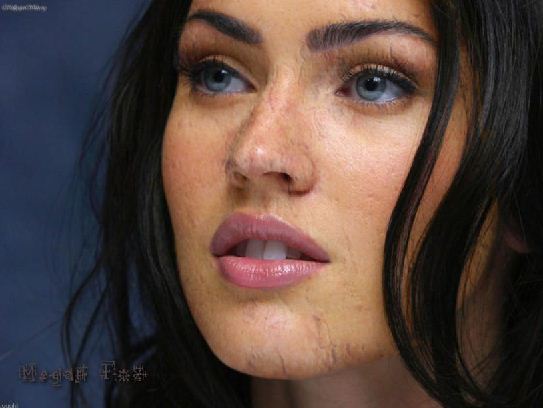
Here is the final result:

Monday, December 24, 2012

Image Extraction Using Channels in Photoshop

One of the most sought-after tutorial a Photoshop user needs to know is how to extract images, ranging from simple to the more complex one, like strands of blown hair, trees, and other images that has intricate edges. Dealing with backgrounds can be a headache also if it happens to be in different colors and hues. Flat, solid colors are the easy ones to work with, which is why most tutorials posted across the web uses this simple photos as their subject.

The difficulty in extracting an image, whatever tool you use, varies depending on the complexity of the photo used. There’s a more effective tool that suits a specific image, actually. For example, a simple photo with a plain white or solid background can easily be extracted via the Quick Selection Tool or Polygonal Lasso Tool without going through a more time-consuming Channels and Layer Mask tool. But then, it’s also a question of comfortability and ease which, if I may to choose, prefers the latter indeed.

In this tutorial, we will tackle the extraction work in a more detailed approach, and the use of the not-so-common Channels tool in Photoshop. Although I believe that the more advanced users of the program are very much familiar with this, especially with layer masking, and use this tool for their extraction work.

Stocks Used


1. Background


2.Britney Spears

Preview


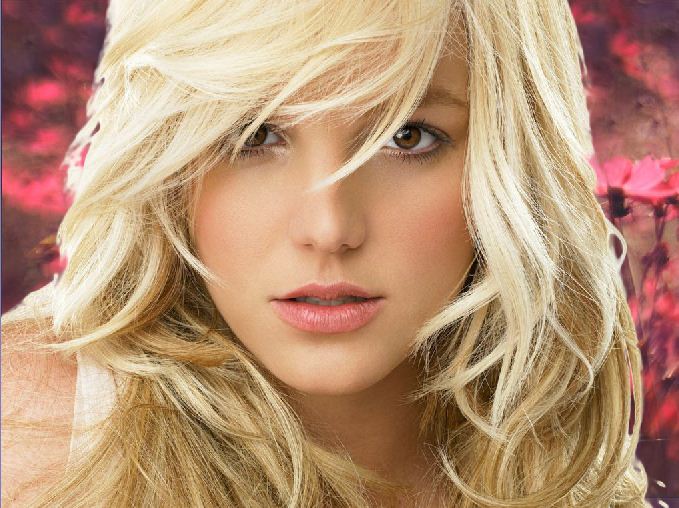
Here is the before and after image. I've added a multi-color effect on the image as well other than the background. It is optional though because we will be focusing more on the topic of extraction using the channels method.

Step 1


To begin with, it’s important to note that our image is in RGB mode, and that we will be sticking in this mode throughout the course of this tutorial. You will recall that every RGB image contains a Red, Green and Blue channel. Let’s start by analyzing the 3 channels to determine which one will provide the best starting point for extracting the model from the photograph.
Since the hair is going to be the most challenging part of the extraction, what we are really looking for is the channel where we have the best contrast between the hair and the background.
Based on the above images, the blue channel appears to have the best contrast compared to that of the red and green channels which are both light and has a poor contrast between the hair and the background . So, we'll take the blue channel and then duplicate it.

The image below shows the problem areas that we have to fix: the background and the side edges of the hair appears to be both white in color, and it's hardly visible for the strands of hair to be recognized. So we'll have to fix these. To do so, we'll do that in Step 2.


Step 2


Now, with our duplicated blue channel selected, we are going to enhance further the contrast of the image by going to Image>Adjustments>Brightness/Contrast...


After the above, we will adjust the contrast more to obtain an almost black and white image. To do it, go to Image>Adjustments>Levels...with the following settings:
Here is the result:
These numbers will vary drastically from photograph to photograph, but the basic idea is to adjust these values to the point where the background is black and most of the hair is white (or vice versa, as in this case). The thin strands, however, should retain a certain amount of grey, as you can see in the screenshot above. Also, try to increase the contrast to the necessary minimum, since too much contrast can cause some of the finer details to vanish, and for some of the softer edges to become jagged and rasterised.

Now, grab the Burn Tool and apply on the edges of the hair to blacken some of the strands while leaving the finer parts on their original (i.e., grayish) state. And then, paint the image black totally using the Paintbrush Tool. It will look something like this for now:
Okay, before leaving this step, Ctrl+click the blue channel copy, and marching ants of some sort will be seen. This signifies that the image is selected.

Step 3


In this step, we want to turn the RGB channel back on so that we can see everything in full colour again.

Step 4


Switch back to the Layers palette, double-click the background to unlock it. This will become Layer 0, by default. Go to Select>Inverse..., then apply layer mask by clicking the Add layer mask icon below the layers palette. It should look like this now:

Step 5


Open a new layer for your background. You can choose whatever you like - solid color, gradient, pattern, or another image. I uploaded an image here (see above stock) then converted it into a pattern (via Edit>Define Pattern...). Place this under the existing layer.

Step 6


For the finishing touches, take your Burn Tool and apply moderately around the edges of the hair to brush away the rough edges. After this, apply Refine Mask to enhance the masked image, if necessary.
Merge visible layers for now...
Go to Image>Adjustments>Curves...

Step 7


Time to colorize the image. Paint it diagonally with diffeent colors using a large, soft brush. When filled, apply Gaussian Blur, radius to maximum to the right, and then set the blending mode to Linear Light (or any mode that suites your subject).
DONE!