The difficulty in extracting an image, whatever tool you use, varies depending on the complexity of the photo used. There’s a more effective tool that suits a specific image, actually. For example, a simple photo with a plain white or solid background can easily be extracted via the Quick Selection Tool or Polygonal Lasso Tool without going through a more time-consuming Channels and Layer Mask tool. But then, it’s also a question of comfortability and ease which, if I may to choose, prefers the latter indeed.
In this tutorial, we will tackle the extraction work in a more detailed approach, and the use of the not-so-common Channels tool in Photoshop. Although I believe that the more advanced users of the program are very much familiar with this, especially with layer masking, and use this tool for their extraction work.
Stocks Used
1. Background

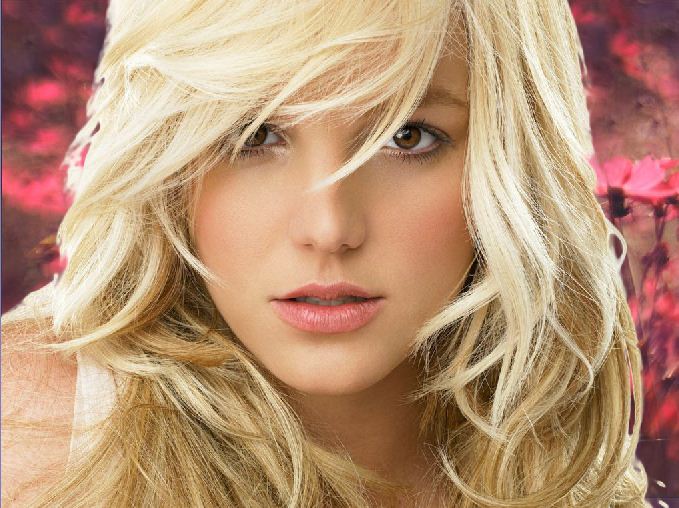
2.Britney Spears

Preview
Here is the before and after image. I've added a multi-color effect on the image as well other than the background. It is optional though because we will be focusing more on the topic of extraction using the channels method.

Step 1
To begin with, it’s important to note that our image is in RGB mode, and that we will be sticking in this mode throughout the course of this tutorial. You will recall that every RGB image contains a Red, Green and Blue channel. Let’s start by analyzing the 3 channels to determine which one will provide the best starting point for extracting the model from the photograph.


Step 2
Now, with our duplicated blue channel selected, we are going to enhance further the contrast of the image by going to Image>Adjustments>Brightness/Contrast...

After the above, we will adjust the contrast more to obtain an almost black and white image. To do it, go to Image>Adjustments>Levels...with the following settings:


Now, grab the Burn Tool and apply on the edges of the hair to blacken some of the strands while leaving the finer parts on their original (i.e., grayish) state. And then, paint the image black totally using the Paintbrush Tool. It will look something like this for now:


Step 3
In this step, we want to turn the RGB channel back on so that we can see everything in full colour again.

Step 4
Switch back to the Layers palette, double-click the background to unlock it. This will become Layer 0, by default. Go to Select>Inverse..., then apply layer mask by clicking the Add layer mask icon below the layers palette. It should look like this now:


Step 5
Open a new layer for your background. You can choose whatever you like - solid color, gradient, pattern, or another image. I uploaded an image here (see above stock) then converted it into a pattern (via Edit>Define Pattern...). Place this under the existing layer.


Step 6
For the finishing touches, take your Burn Tool and apply moderately around the edges of the hair to brush away the rough edges. After this, apply Refine Mask to enhance the masked image, if necessary.
Go to Image>Adjustments>Curves...

Step 7
Time to colorize the image. Paint it diagonally with diffeent colors using a large, soft brush. When filled, apply Gaussian Blur, radius to maximum to the right, and then set the blending mode to Linear Light (or any mode that suites your subject).


