Preview

Step 1: Preparing the Photo
Open your photo to be used, double-click the layer created in the layers palette to unlock it which becomes "Layer 0" as a result. The image I used can be downloaded here if you prefer to use this to get along.
Step 2 : Creating the Rectangles
Create a new layer above the existing layer. Grab the Rectangular Marquee Tool then make rectangles with different sizes randomly onto the image. Don't fill the whole photo yet with rectangles as we will be creating 2 layers more of this.

Step 3 : Creating the Second Set of Rectangles
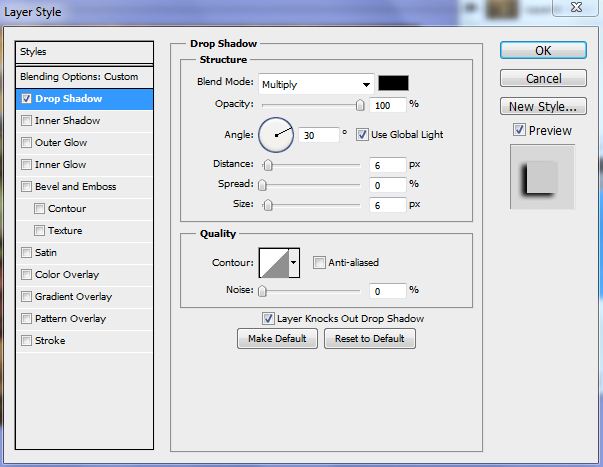
Create another layer and do the same process as Step 1 except for the color which should be light gray. When finished, click Layer 1, right-click it and select "Copy Layer Style". Switch back to Layer 2, right-click it and select "Paste Layer Style".
Step 4 : Finishing the Last Set of Rectangles
Create rectangles again, but this time use white color to fill them. Afterwards, activate Layer 3, right-click it, then select "Paste Layer Style". So, finally, we're done with the rectangles and here's what we got:
Step 5 : Choosing the Background
You can put any background you want. Here, I preferred to have a simple yet effective solid color. So, to do it, Ctrl-click first Layers 3, 2, 1 icons to select the contents, then activate Layer 0 (our original layer), hit Ctrl-J to create a new layer (e.g. Layer 4, as a result). Select Layer 0 again, then after selecting the orange color, go to Edit>Fill..., then select the foreground color. Here's our layers palette look like :

No comments:
Post a Comment