Preview

What we need
Step 1 : Prepare the photo
After opening the photo, go to the Channels palette and select which of the channels give the best contrast. In this case, it is the green channel that offers the best result.
Step 2 : Prepare the displacement map
Duplicate the Green channel by right-clicking it, then choose Duplicate channel. In the dialog box that appears, select the Destination as New. A new layer (Alpha 1) will be created as a result inside your channels palette.

Step 3 : Select the face
First, switch back to RGB to see the photo in full color again, and then, go to Layers palette. After this, duplicate the photo. Now, select the face using the Lasso Tool. When done, select the eyes, eyebrows, lips, and hairs in the face which we don't want to include in the texture-mapping. Observe the icon selected below.

Step 4 : Bring in the texture
First, we will make the texture into a pattern by going to Edit>Define Pattern of which you will select the opened texture, of course. This will then be saved to your pattern lists. Now, go to Edit>Fill and select Pattern. Select the pattern you've just saved, and presto, the selected faced has changed into a pattern!
Step 5 : Making the color adjustments
So, first, change the blend mode from Normal to Overlay (or what is best depending on the photo you used), then set the Opacity to 50%. You can deselect the selected areas for now (Ctrl-D).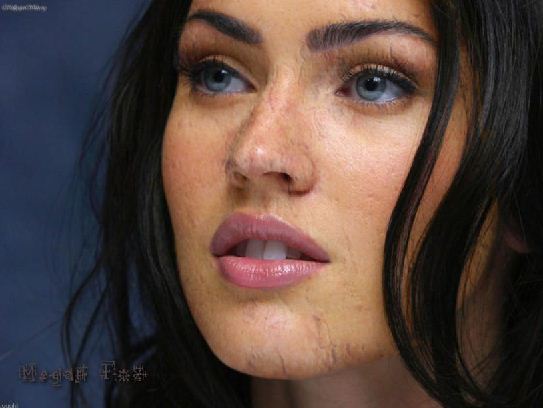


Step 6 : Run the displaced filter
Go to Filter>Distort>Displace...In the dialog box that appears, set the values both to 10, then open the psd file that we have saved afterwards.


Step 7 : The finishing touches
To soften the edges of the pattern, use the Blur Tool using a soft brush; the Smudge Tool to hide the supposedly covered skin with hair; and some Burn Tool where needed. Apply the Curves in the Adjustment filter under Edit with the following values:
Here is the final result:

No comments:
Post a Comment